Join Ubuntu host into LDAP
套件安裝與精靈設定
~$ sudo apt-get install libnss-ldap libpam-ldap ldap-utils
接下來會跳出互動式設定畫面,請依下列步驟設定:
輸入LDAP server位置,注意,default值是ldapi:///servername,請改成ldap://servername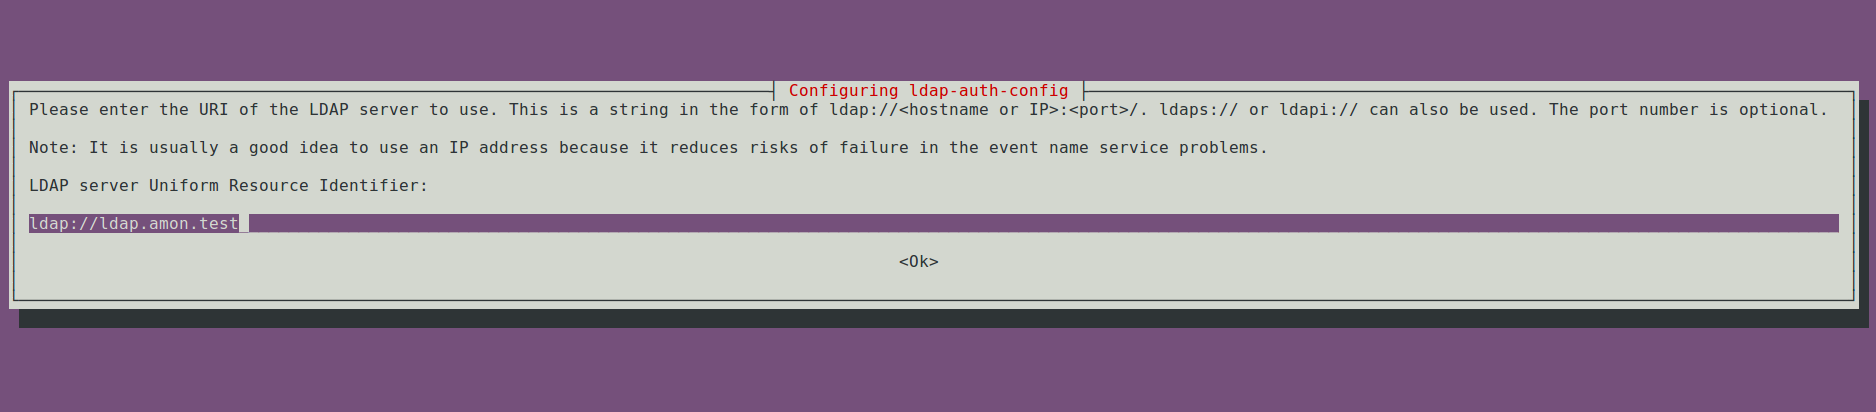 設定basedn
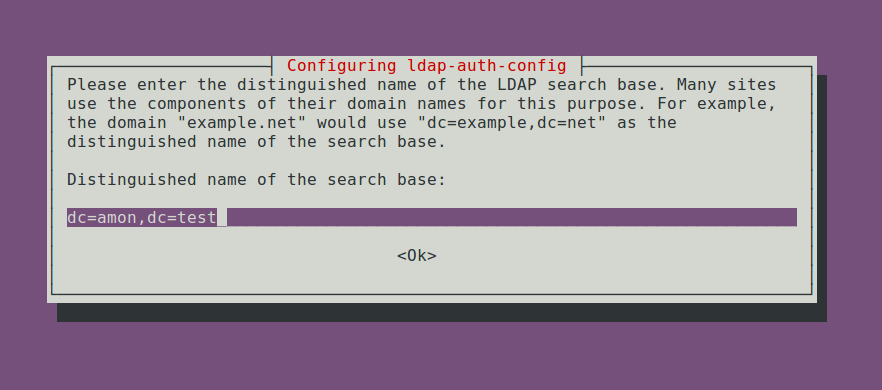 選擇LDAP version,依需要join的LDAP server而定
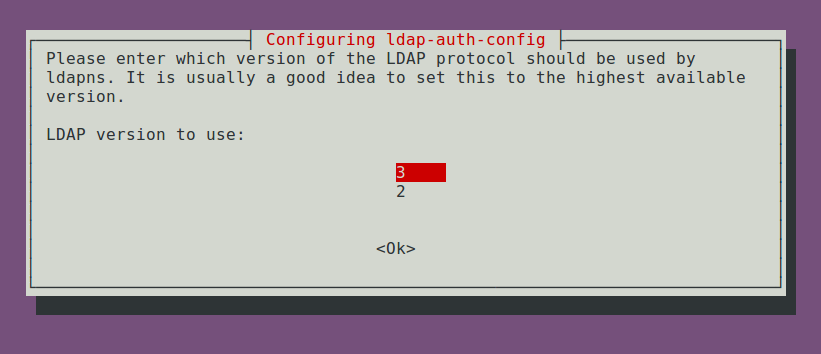
選擇yes

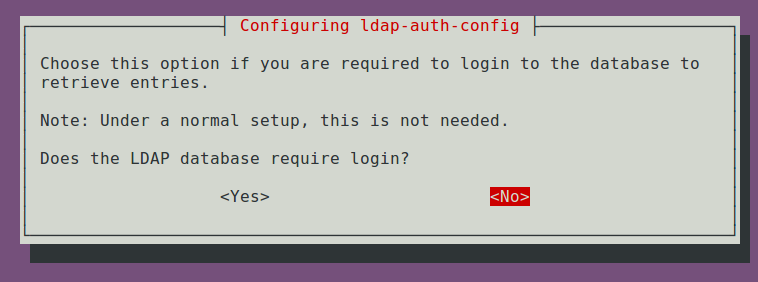
因為不需要,請選擇預設值,no
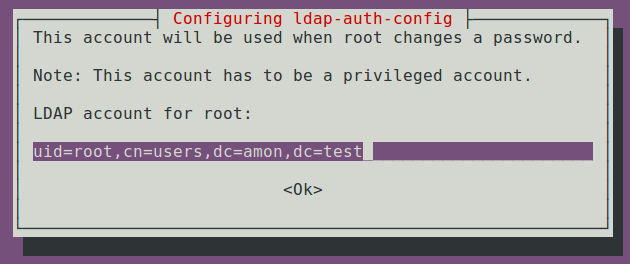
設定rootdinddn,假如不需要讓使用者可以在Ubuntu上變更LDAP密碼,可把rootbinddn綁在某個一般使用者上。
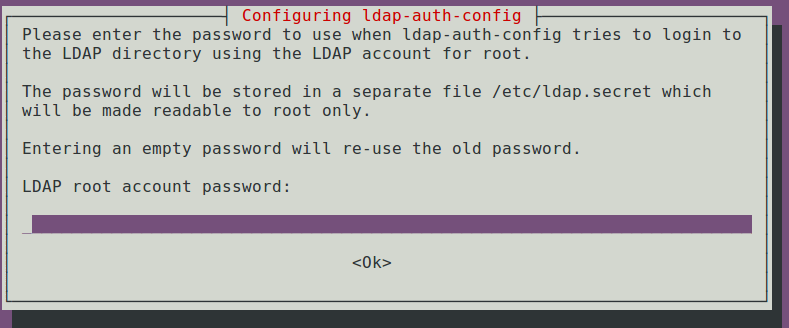
輸入rootdinddn驗證密碼後結束精靈設定
編輯ldap.conf,加入bindn, 預設會透過該bindn做uid查詢
~$ sudo vim /etc/ldap.conf
binddn uid=user,cn=users,dc=synology,dc=com
bindpw <password>
以上步驟所設定之內容,可於/etc/ldap.conf中找到,若設定錯誤需要重新設定時,可執行下列指令把設定精靈再叫出來:
~$ sudo dpkg-reconfigure ldap-auth-config
其他設定
修改nsswitch.conf設定檔
~$ sudo vi /etc/nsswitch.conf
在passwd, group, shadow項目後加上ldap
passwd:     compat ldap
group:      compat ldap
shadow:     compat ldap
讓使用者登入自動創建home folder
~$ sudo vi /etc/pam.d/common-session
加入下行:
session optional pam_mkhomedir.so skel=/etc/skel umask=0007
umask請依實際需求調整,這邊建議使用0027,若權限要求較嚴謹可用0077, 多人開發環境則使用0007
拿掉use_authtok選項
~$ sudo vi /etc/pam.d/common-password
password     [success=1 user_unknown=ignore default=die]     pam_ldap.so try_first_pass
至目前為止設定,已可透過LDAP帳號從tty console或SSH登入Ubuntu中,若無法正常登入,請觀察auth.log並依照其訊息排除錯誤。
~$ tail -f /var/log/auth.log